Green Living Tips for Today’s Busy Families

greenModern day families live a hustle and bustle lifestyle. Between driving kids to activities, working, shopping and maintaining a household, there is little time to think about the environment. Many decisions are made hastily and in the name of convenience because there is simply not enough time to plan for the long term and the big picture.

The solution to this dilemma is to implement small changes that, over time, will become habits and part of the daily routine. As you change over to living greener, you will find that you often save both time and money in the long run. More importantly, you will be saving the planet and making it a better place for your children and for generations to come.

Eating Green

Food is a great place to start when changing over to a more environmentally friendly practice. The first thing you will want to do is buy organic whenever possible. You don’t want to feed your family the pesticides found on many commercially grown crops or the hormones fed to much of the livestock. Shopping at a local farmer’s market is a wonderful way to get organic foods and support your local farms. A convenient way to fit this in is seeking one out that is nearby to your children’s activities so that you can pick up the produce while waiting for the kids to finish up with a practice or club meeting. If you have the time to go a step further, try growing some of your own foods in a pesticide free garden at home.

Try to ditch the processed foods that are filled with preservatives and chemicals. Keep a bowl filled with fruit accessible to the family for snacking. Veggies and dip are another healthy snack option. You can also bake some homemade snacks so that you can control the ingredients. If you are worried about the cost of buying organic foods, remember that if you take some other green steps, such as cutting down on your meat intake and no longer buying commercial cleaning products, your grocery bill should not show any significant changes.

Another food related tip is to stop shopping for beverages altogether. The best drink for anyone in your home is water. You don’t need to buy cases of plastic water bottles to obtain it, either. Instead, invest in reusable bottles for the whole family that they can take on the go. If you do not like tap water, make another one-time purchase of a water filter.

If you are a coffee lover and often visit your favorite coffee shop in the morning or between stops after school, consider buying one of their reusable cups rather than a paper or foam cup each day. If you do wind up with an old paper cup, think about using it as a planter or rinsing it out and using it to clean paint brushes during the kids’ next craft project.

When it comes to preparing foods, use the microwave as little as possible. If you must use the microwave, be sure to never use plastics in it. The Environmental Working Group states that certain chemicals in plastics have been linked to birth defects, and these chemicals are released when heated.  In fact, avoiding plastics as much as possible is a good rule of thumb because they are terrible for the planet anyway. The worst offenders that you will want to avoid are those marked with a three, six, or seven on the bottom.

Keeping a Clean, Green House

For cleaning, there is no reason to buy chemical products. White vinegar can clean almost anything. If you also add castile soap, tea tree oil, baking soda and borax to your cleaning cupboard, you will be all set to clean your home from top to bottom with all natural substances, and for a fraction of the usual cost. Since you will be mixing your own cleaners, you will also be able to reuse the spray bottles, causing less waste.

Cutting Down on Household Waste

When you take your trips to the store, be sure to bring your own reusable shopping bags. They don’t have to be anything fancy or expensive. Anything you have at home that can carry groceries will do. If you can reuse bags, then factories will produce less of them. This saves trees in the case of paper and prevents harmful chemicals in the case of plastic.

With paper, there are lots of ways to save. First, instead of sending out letters and invitations, use email and evites. To clean out your own physical mailbox, consider opting out of junk mail. Catalogchoice.org and DMAchoice.org are two websites you can visit to do this. You can also go paperless with most of your bills by visiting each company’s website or making a phone call to let the company know that you prefer to have your bills sent electronically. On holidays, be creative. Think of wrapping a gift in something you have around the house, like newspaper, fabric or brown grocery bags.

Making your house run more efficiently is not as difficult as most people think. You can take some simple steps that will save your family a lot of money and the planet a lot of energy. Start with the refrigerator, because this is the appliance that uses the most electricity. Unplug it and clean the coils every six months with a vacuum attachment. Ensure its settings are placed where they are most efficient: between 38 and 40 for the fridge and zero and five for the freezer. Next, think about your water use. Consider replacing fixtures and toilets with low-flow versions. Use water saving shower heads, and think about getting faucet aerators. Only run your washing machine and dishwasher when they are fully loaded, and when it comes to clothes always use cold water. Replace your standard light bulbs with energy efficient fluorescent ones, and leave notes near room exits to remind family members to turn off the lights when leaving. When you have items plugged in, even if they are turned off, they are using energy. Use power strips to plug these in so that you can shut the strip off easily instead of having to unplug each item one by one.

When cleaning out clutter in closets and garages, instead of just throwing things away, consider freecycling the items instead. Freecycling is just a fancy way of saying “giving it away.” What you don’t want, someone else may be able to use. You can donate the items or visit The Freecycle Network’s website and post what you have to offer to your local group. Often, someone is willing to come and pick up your unwanted clutter the same day. You can also utilize online classifieds such as Craigslist to give away items. This keeps items out of landfills and allows someone else to put them to good use.

Busy families spend a lot of time in their cars commuting to work and activities. If you find your child has a local friend attending the same activity, ask the parents if they would like to have the kids carpool and take turns driving. This can free up time and gas money for both families, while reducing harmful toxins in the air. Keep your tires pumped up to save gas. When it comes time for a new family vehicle, consider a hybrid.

Teaching Green Habits

Children learn from their parents, mainly from watching what their parents do. The best thing you can do as a parent is instill a love for the planet in your children by cultivating that within yourself. When your kids see you taking care and pride in your environment, they will learn to do the same. Taking walks out in nature, playing outdoors, flying kites and watching the sunset are all wonderful activities that can deepen your family’s relationship with the Earth and help them appreciate the need for a greener lifestyle. Choosing to live green benefits everyone in many ways. The planet as a whole supports you better, your health thrives and your finances improve. Each of these simple changes can be implemented over time without the family feeling any major shift in their routines, yet the impact this green makeover will have on your family and your surroundings is priceless.

10 iPhone Apps You Can Use to Monitor Your Kids Internet Use

boysmartphoneThere is no doubt that the iPhone can act as a great educational and entertainment tool for kids. However, with such a powerful tool at his fingertips, your little one may inadvertently stumble upon inappropriate or harmful content. With these 10 parental control apps, you can monitor and control what your child accesses through his phone, providing a safe and enjoyable environment that will give you peace of mind, too.

  • K9 Web Protection Browser – This app is a must have for cautious parents everywhere. While most parental control apps block almost everything to the point of excess or allow scads of questionable content through, K9’s intelligent web browsing technology identifies only potentially harmful or inappropriate sites. Pornography, malicious or phishing sites are automatically added to the blacklist, allowing your kids to browse in complete safety. Best of all, the app is free.
  • Mobicip Safe Browser – Mobicip offers some great filtering features, which allow you to set protocols for multiple users according to age or preference. You can allow or block by category, keywords and specific websites. The browser is similar to the iPhone’s default Safari browser, which will eliminate the learning curve. This free app also comes with a time limit feature, which allows you to control how much time your kids spend on the internet.
  • Kidsafe YouTube Lite – Designed to filter Youtube videos, Kidsafe lets you determine what is safe for your little ones to watch. The app automatically blocks adult related content, however, you can also choose entire categories, playlists or single videos to block or allow. For total control, you can set up bookmarked lists of videos with this free app, creating a completely parental approved collection of content for your kids.
  • Ranger Browser – As well as filtering inappropriate content, Ranger Browser allows you, as the parent, to monitor your child’s Internet history from anywhere in the world. The browser takes advantage of already established and trusted blacklists and whitelists to create safe filters for your child. Ranger Browser also has a time limit feature, which you fully control. This is another great free app for the parents of iPhone users.
  • Browser for Kids – For $0.99 you get to control everything that your kids browse using their iPhone or iPad. Unlike many other parental control apps, the time limit feature on Browser for Kids uses a password lock. Your child cannot access the browser after the allotted time until the next morning or when you enter the password.
  • B.O.B. – The Parental Control Web Browser – The problem with a lot of parental control apps is that they rely on blacklists or search filters that are easily bypassed by determined site creators. With B.O.B, your child cannot view any site that you have not approved. The app comes at the cost of a one-off $3.99 fee, however, many similar apps charge much more for premium access on a yearly fee.
  • McGruff SafeGuard Browser – Multi-user features are hard to find on kid-safe browsers, so McGruff SafeGuard Browser is definitely an app to consider as it supports profiles for all the family. The blacklist feature prevents access to pornography, questionable content sites, inappropriate YouTube content and potentially dangerous websites. Parents also have the option of taking complete control of each child’s browsing habits. Add a detailed summary of browsing history for parents to the list, and this free app more than stacks up against the competition.
  • Screen Time – Just as the name suggests, Screen Time sets limits on how much time your child spends using his iPhone. The app lets you predetermine the amount of time for each child, and when time runs out, the app sends a series of notifications letting your child know. Before your child can access the iPhone again, you must enter a four digit pin-code. This free app is extremely effective and easy to use, and allows you to set boundaries for your child’s phone time.
  • Kids TV – Safe Videos For Children – With Kids TV you can utilize handpicked video lists that are specifically aimed at kids, as well as set up your own filter lists. This app is all about giving parents total control and providing peace of mind that your kids are safe on the net. The app usually costs $1.99, however, the developers often run promotions giving Kids TV away for free.
  • AppCertain – The app monitor – How about an app to tell you when your kids install new apps? AppCertain will send you an email every time your child downloads and installs a new app on his iPhone. You receive a short description of the app, which allows you to decide whether it is age appropriate or not. Combine this free app with a parental control browser and you will virtually ensure your child never views inappropriate content from his iPhone.

How to Save a Tooth That Gets Accidentally Knocked Out

toothIt happened. Maybe it was a sports injury, a bite from an apple or your child’s head slamming into your mouth, but whatever the cause, you find yourself holding your tooth in your hand. Before you panic, know that in many cases a knocked out tooth can be saved and reimplanted. You just have to act fast.

Take Precautionary Measures Immediately

The first thing you want to make sure of is that you are holding the tooth by the crown and not the root. The roots are fragile and, if damaged, are beyond repair. If it is dirty, rinse the tooth in water. If you have the option to use salt water, saline or milk to rinse it, use one of those instead. It’s better to use a bowl for rinsing, or at least run the water in a very slow and gentle stream, because even a rush of water can harm the root. Make sure not to brush or scrape at the tooth while cleaning it. Also, do not use any soap, toothpaste or any other chemicals. Finally, do not dry the tooth when you are finished under any circumstances. If your mouth is still bleeding, apply gauze and press until the bleeding subsides. You can use ice for pain or swelling of the gums.

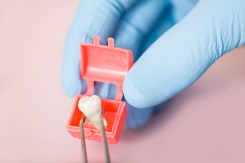
Now that you are holding the tooth by the crown and it is clean, you can try putting the tooth back into its socket. Position it in the correct space and bite down gently. You can use some gauze or even a moistened tea bag to bite down on. If for some reason it is not possible to reinsert the tooth, put the tooth in a container with some whole milk or with saliva. The tooth must be kept moist at all times in order to save it, but do not submerge or store it in plain water. Another option you have is to stick the tooth behind your lower lip so it is nestled between your lip and gum. This will keep it wet. Some first aid kits have a container in them with fluid made specifically to save knocked out teeth. Check and see if you have one of these. If you do, use it. This fluid will usually save the tooth for longer than the other methods.

Get to the Dentist as Soon as Possible

Now, you should immediately head to your dentist, or any nearby dentist, with your tooth. Get there as fast as possible for the best odds of being able to reimplant your original tooth. Remember, your tooth is alive, but it starts to die 15 minutes after it is removed from the body. Keeping it moistened with saliva or whole milk extends its life somewhat. If you have a tooth saving product in your first aid kit, it can live on for about a day, but you still need to seek medical attention as quickly as possible for the best odds.

If you have already put your tooth back in place, you actually took the first step to reimplanting it. The dentist will then make sure it is in the right spot and splint it to the adjacent teeth with clear plastic or wire to hold it steady while it heals. If the dentist tells you your tooth cannot be saved, do not despair. You will have options such as a bridge, an implant or a denture.

Take Special Steps for Little Ones

Please note that if it is a child that has lost a tooth, and it is a baby tooth, you should not try to place the tooth back in its socket. If this tooth reimplants, it can harm the bud of the new adult tooth. Store the tooth using one of methods outside of the mouth and seek the advice of a pediatric dentist. In most cases, the baby tooth will simply be left out and that area will remain toothless until its permanent replacement grows in. Since all children lose their teeth at some point and have to go without them while waiting for the new ones, this is not usually so bad.

Most times, dental avulsion is something that happens by surprise and there is no way to avoid it. However, there are some things you can do to lesson your chances of it happening. For example, it is a fact that in sports more than five million teeth are knocked out each year and athletes without  mouth guards are 60 times more likely to suffer dental injuries. If you play contact sports, you should be sure to wear a mouth guard. When it comes to food, try not to bite down on hard candies, stale bread or bones. Finally, always be sure to wear your seat belt when in a vehicle to avoid tooth loss resulting from sudden impact in the event of an accident.

10 Ways to Remove a Bee Stinger Without Using Tweezers

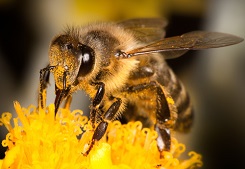
beesBees are magnificent creatures. They are brightly colored and seemingly good natured. They work all the time, but do so quite happily, buzzing from one beautiful flower to the next. Most times, they are quite peaceful and docile. They simply want to make their honey and protect their queen. However, bees get nervous when anything threatens their chances of completing those goals. If a bee feels it or its hive may be in danger, it will engage its last resort, its sting, often giving up its life to do so. This is a sad ending, not only for the bee but also for the person who is stung. A bee sting burns and swells and must be treated quickly.

The first step in treating a bee sting is to remove the stinger. While many people reach for the tweezers, some suggest that this is not the optimal method to use. By squeezing the stinger, more venom can be released. Chances are, if you are out and about you may not have access to tweezers anyway. Here are some other methods to quickly and safely remove a stinger without reaching for cosmetic implements.

  • Reach for a Credit Card – Using the edge of a credit card, brush the surface of the skin. Start from an area behind the point of entry and push forward. The stinger will catch onto the edge of the card and slide out.
  • Whip Out a Needle – Sterilize a needle or pin with rubbing alcohol or boiling water and scrape the skin surrounding the stinger until the stinger is extracted.
  • Press Your Nail File into Service – Use the sandy side of a nail file to make short, quick strokes against the location where the stinger is lodged.
  • Use an Onion – One home remedy suggests using an onion to scape at the stinger. While it may take a few more scrapes to push it out, it is said that the onion takes away both the pain and the itch.
  • Scoop Up a Butter Knife – Use the dull edge of a butter knife to brush the skin and drive out the stinger.
  • Use Your Fingernail – Something you always have on you is your own fingernail! Use your nail to stroke the skin until the stinger is dislodged. It’s important to thoroughly wash the area afterwards, however, as your fingernails harbor more nasty bacteria than most people realize.
  • Penny – A penny, or any coin you have handy, can be used to scrape and extract a stinger. There is also an old wives’ tale that states that taping a penny to a sting (after the stinger is removed, of course) relieves pain and swelling.
  • Ice – If scraping at the stinger is not working, try icing it first. By first freezing the stinger, the scraping method often works faster and it helps to ensure the stinger comes out all in one piece. If the stinger is deep in the skin and you cannot see it, push down on the skin either in front of, or on the sides, of the point of entry. This should cause the stinger to rise up so you can see it. You may have to keep pressing down with one hand while scraping with the other.
  • Tape – Children often prefer this method of removal. Apply a piece of tape to the stinger location and gently pull the stinger forward, not up, until it is fully removed from the skin.
  • Wax – Usually the wax of choice for this is hair removal wax, but lanolin has also been known to work. Attach the sticky wax to something like a twig or toothpick and touch it to the stinger. Then, gently pull the stinger forward and out. You can also place the wax on the stinger and apply the paper or cloth used for hair removal to the wax and then guide the stinger slowly out.

The most important aspect in removing a stinger is to do it quickly. As much as you want to avoid squeezing out more venom, and thus causing more pain and swelling, it is better to get the stinger out than to leave it in. As you can see, there are many options, and one of them should be readily available to you no matter where you might be at the time of the injury.

Remember to be mindful of possible allergic reactions. Symptoms of an allergic reaction are hives, swelling, respiratory distress, dizziness and fainting. If you see or experience any of these signs, seek medical attention immediately.